Sure, it looks like a crazy science experiment gone wrong. But this thing kicks ass at drying lots of gear so the next day you’ve got warm and dry gear to put on.

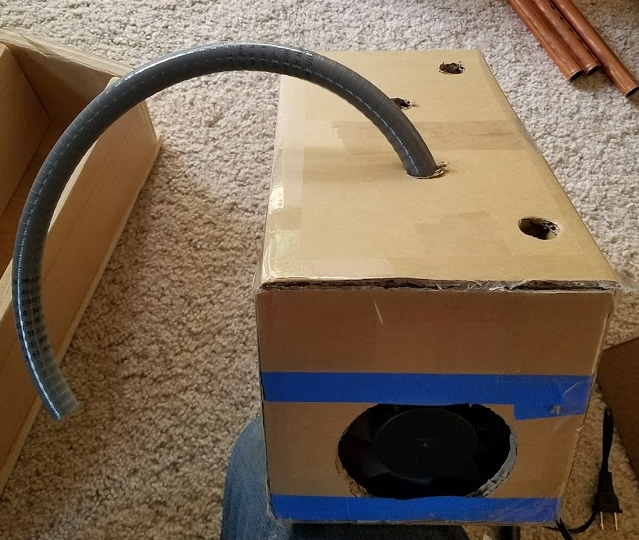
I started with a prototype made of cardboard. I’d really recommend that to anyone as you probably have plenty of it laying around and with some tape you can make a design and see how well it will work. In a pinch, you can even get by with a cardboard model for quite some time.
There are two core concepts with a snowsports dryer:
- Have everything spaced out so they can dry. This is pretty easy to achieve as you can just hang things up, no big deal.
- Blow warm and dry air inside of things like gloves, mitts, and boots. This is the tricky part and why you can’t just leave wet gloves out on a table and expect them to be dry anytime soon.
For $19 I got a 120mm muffin fan that pushes 51CFM. There are more powerful ones, but I wanted something relatively quiet and honestly even with almost a dozen wet items to deal with this fan has been doing the trick.

The fan sucks air into the airtight box, and then you’re faced with the challenge of getting it to your boots/gloves/whatevers. I decided to go a little hardcore and use 1/2″ hose barbs, screwed onto fittings between a piece of particle board. That the whole box was done with 3/4″ ply and particle board was no accident. The hoses are tough and pull on the box. The fan needs to be mounted firmly. You can expect the box to get kicked, bumped, and treated with neglect. I opted to make it beefy.
What’s cool about using barbs like this is that you can get creative with the types of hoses you use after the fact without really doing anything to the dryer itself. I even installed some T fittings on the ends.

Before I put the top on (with all the fittings) I used some foam crack filler to seal up the interior as much as possible. The whole thing is screwed together in the hopes that it can handle a lot of abuse. The fan is rated at 67,000 hours, which at 100/days of service per year running for 5 hours at a clip I should be able to snowboard 134 seasons before I need to replace the fan.

For the hose I found 25′ of 1/2″ conduit for $10. It’s pretty stout stuff and maintains its curve fairly well which is a blessing if you want it and a curse if you don’t. I slashed the bottoms that fit over the barbs so they can come off easier, and put little holes near the ends in the sidewalls that go into the boots/gloves.
I can dry 10 items at a time, and the whole thing breaks down relatively easily. I place it (safely) near the pellet stove so there’s plenty of warm air about and no need to add a separate heating element. It’s sort of obvious: after a day of snowsports you want to be warm and dry too so the heater will most definitely be on.
If I had to do another, my shopping list would look like this:
- 10 pipe fittings, cost around $15.
- 3/4 ply or particle board, maybe $5-$20.
- Fan, $20.
- Hose, $10.
Done cheaply you’ll be in for around $50 and have something that absolutely clowns on the piece of garbage plastic jobbers out there, nevermind you’ll have 5x the capacity and a much longer product life. The only downside is that you’ll have an octopus of death dryer in your living room.
